
Images play a crucial role in the design, engagement, and functionality of your website. They capture attention, illustrate points, and improve your user experience. But while they enhance content visually, they also come at a cost, site speed, and SEO performance.
Poorly optimized images can slow down your pages, increase bounce rates, and negatively affect your Google rankings. On the other hand, well-optimized images can load faster, rank better, and keep users engaged longer. That’s why learning how to properly optimize your website images is one of the smartest things you can do for site performance and search visibility.
This guide will walk you through how to optimize your images for both speed and SEO in a detailed and beginner-friendly way.
What Is Image Optimization?
Image optimization is the process of reducing the file size of your images without significantly sacrificing quality while also making them accessible and discoverable to search engines.
This includes:
- Choosing the correct image format
- Resizing images to appropriate dimensions
- Compressing files to reduce size
- Naming files descriptively
- Using relevant alt text and captions
- Structuring image delivery for responsiveness and mobile
Image optimization helps balance visual quality with performance and SEO effectiveness.
Why You Need to Optimize Your Website Images?
1. Improved Site Speed
Images are often the largest assets on a webpage. Optimizing them can significantly reduce load times, especially on image-heavy pages. Faster sites lead to better user experiences and lower bounce rates.
2. Higher SEO Rankings
Google considers page speed, mobile-friendliness, and image optimization as ranking factors. Proper alt text and descriptive file names also help your images appear in image search results.
3. Mobile Optimization
With the majority of web traffic now coming from mobile devices, delivering properly sized and formatted images for smaller screens is critical.
4. Reduced Bandwidth and Hosting Costs
Smaller images use less server space and bandwidth. If you’re on a shared or limited hosting plan, image optimization can significantly cut your overhead.
5. Better User Engagement
Faster-loading pages lead to lower bounce rates, increased time on site, and higher conversion rates. Clear and relevant images also help communicate your message effectively.
Related: How to Start a Blog
How to Optimize Your Website Images
Optimizing images is essential for improving both page load speed and search engine visibility. The process involves two major areas of focus:
- Speed Optimization: Ensuring images load quickly and efficiently across all devices.
- SEO Optimization: Making images more discoverable and understandable to search engines.
Each type of optimization plays a key role in website performance and organic visibility. In the sections that follow, we’ll break down specific steps you can take to master both.
Part 1: Optimizing Images for Speed
1. Use the Right File Format
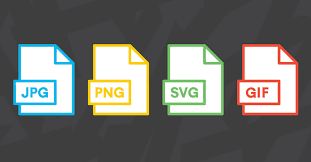
Choosing the correct file format is the foundation of image optimization. Different formats are designed for different use cases, and using the wrong one can unnecessarily bloat your image size.
- JPEG/JPG: Ideal for photos, gradients, and complex images. This format uses lossy compression, which significantly reduces file size while maintaining acceptable quality for the human eye.
- PNG: Best for graphics, logos, and images requiring transparency. It uses lossless compression, so the quality is preserved, but file sizes tend to be larger.
- WebP: A modern format developed by Google, WebP provides high-quality visuals at much smaller file sizes compared to JPEG and PNG. It supports transparency and is widely supported in modern browsers.
- AVIF: An even newer format than WebP, AVIF delivers excellent compression with high visual fidelity. It’s gaining traction due to its superior performance, though browser support is still expanding.
Tip: Use Adobe’s image format guide to determine the best format for your specific content.
2. Resize Images Before Uploading
Uploading large, high-resolution images when they’re only displayed at smaller dimensions is one of the most common causes of slow-loading websites.
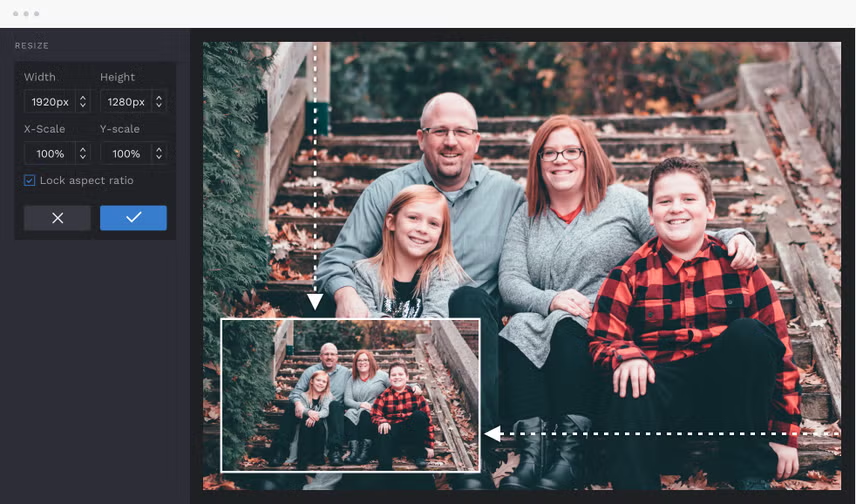
For instance, uploading a 3000px-wide image to display in a 600px blog post area leads to unnecessary data transfer. Resize your images to match the maximum display size.
- Use design tools like Canva, Imagesizer to resize images for headers, thumbnails, and blog content. You can also use Iloveimag to resize multiple images at once.
- Identify the image container size in your theme and upload accordingly. If your post content area is 800px wide, there is no need for images wider than that.
This one step can cut your image file size by 70-80%.
3. Compress Images Without Losing Quality
Compression reduces file size by removing unnecessary data from the image without a noticeable drop in quality.
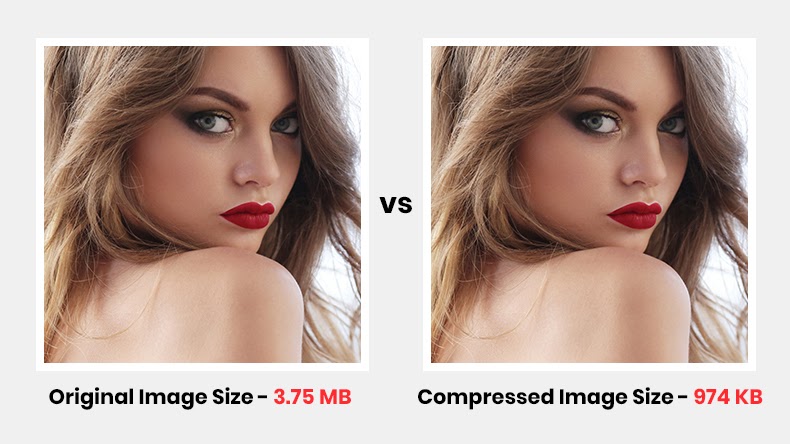
There are two types:
- Lossy compression: Removes some image data to reduce size (best for web).
- Lossless compression: Retains all data but results in larger files.
Top free tools for compression:
- TinyPNG: A Simple drag-and-drop tool, excellent for JPEG and PNG.
- Squoosh: Advanced compression with fine-tuning options and support for multiple formats.
- ShortPixel: Supports WebP and bulk compression.
- Imagify: Great for WordPress users with automatic compression and lazy loading.
Using any of these image optimizers can help reduce your image size by up to 90%, improving your site speed dramatically.
4. Use Lazy Loading
Lazy loading is a technique that defers the loading of images until they are needed, typically when a user scrolls down to them. This improves the initial load time of your webpage because only the content above the fold is loaded immediately.

Instead of downloading all images at once, lazy loading downloads images as the user reaches them. This saves bandwidth and speeds up your page, especially important on mobile devices and slower connections.
How to implement lazy loading:
- HTML Native: Use the
loading="lazy"attribute on image tags:
<img src="example.jpg" loading="lazy" alt="...">- WordPress Plugins: Tools like WP Rocket or Lazy Load by WP Rocket implement this automatically when installed and activated.
This small tweak can significantly reduce Time to Interactive (TTI) and improve Core Web Vitals scores.
5. Use an Image CDN (Content Delivery Network)
An Image CDN hosts your image files across a global network of servers, ensuring they are delivered from the nearest server to your visitor.
Benefits:
- Faster image delivery due to geographical proximity.
- Automatic format conversion (e.g., JPEG to WebP).
- Dynamic resizing based on screen size and device.
Top CDN options:
- Cloudflare
- BunnyCDN
- Optimole (great for WordPress)
An image CDN not only speeds up your website but also simplifies the image optimization process.
6. Test Your Site’s Speed
After optimizing your images, test your website to see the performance improvements.
Use tools like:
- PageSpeed Insights: With this tool, you can view your website’s PageSpeed Insights and identify areas for improvement. It offers optimization suggestions and Core Web Vitals data, which is also a Google ranking factor associated with your site’s performance.
- Google’s Image Optimization Guide: Technical best practices for optimizing images for speed.
Related: How to Increase Website Page Views
Part 2: Optimizing Images for SEO Ranking
1. Use Descriptive File Names
Before uploading an image, rename it to something meaningful that includes relevant keywords. Search engines crawl file names and consider them for image search results.
- Bad example:
IMG_0023.jpg - Good example:
blue-running-shoes-for-men.jpg
Descriptive filenames increase your chances of appearing in Google Images and help reinforce your on-page SEO.
2. Add SEO-Friendly Alt Text
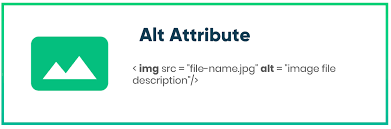
Alt text (alternative text) is used in HTML to describe the content of an image. It serves two critical functions:
- Accessibility: Screen readers rely on alt text to describe images to visually impaired users.
- SEO: Google uses alt text to understand image content, which can help you rank in image searches.
Best practices:
- Describe what’s in the image clearly.
- Include relevant keywords naturally.
- Avoid keyword stuffing.
Example:
<img src="blue-shoes.jpg" alt="Man running in blue Nike running shoes on a city street">Learn more from Yoast’s Image SEO Guide.
3. Use Captions Where Appropriate
Captions are the text that appears directly under an image. While not always necessary, they:
- Help explain the image’s relevance.
- Improve engagement (users often read captions).
- Provide additional context for search engines.
When to use them:
- Infographics
- Charts
- Photographs with key points
Captions should be clear, relevant, and supportive of the main content.
4. Provide Context Around Images
Search engines analyze the surrounding text of an image to better understand its relevance. Never place an image without context.
Tips:
- Reference the image in your body text.
- Use keyword-rich headings near the image.
- Ensure the image adds value to the written content.
Follow Google’s image SEO best practices.
5. Use Structured Data (Schema Markup)
Structured data helps search engines interpret the content of your images more clearly. When you use schema.org tags like ImageObject. Your images can appear in rich results and carousels.
Example:
{
  "@context": "https://schema.org",
  "@type": "ImageObject",
  "contentUrl": "https://example.com/images/blue-shoes.jpg",
  "description": "Blue Nike running shoes worn by a male runner."
}
Use structured data for:
- Product pages
- Recipes
- Tutorials
This is an advanced strategy, but worth exploring if you want richer SERP visibility.
6. Include Images in Your Sitemap
Google can index your images more effectively if they are included in your XML sitemap. If you are managing your site on WordPress using a plugin like Yoast, it makes this easy and automatic as long as it is installed and activated.
Manual Option: Add image entries to your sitemap using <image:image> tags.
Why it matters:
- Helps Google discover images faster
- Improves your image SEO and visibility in image search results
7. Optimize for Mobile Devices
Google follows mobile-first indexing, so optimizing your images for smartphones first before desktops and tablets is essential. Use the srcset attribute to deliver different image sizes based on screen size. Most WordPress themes are mobile-friendly and will display proper image sizes based on the user’s device, or else you are using a different CMS.
Example:
<img src="image.jpg"
     srcset="image-small.jpg 480w, image-large.jpg 1024w"
     sizes="(max-width: 600px) 480px, 1024px"
     alt="Responsive image example">
This ensures users receive only the image resolution they need, reducing load time and improving experience.
Common Mistakes to Avoid
Even with good intentions, many site owners still fall into these common traps:
- Uploading large, uncompressed images directly from a camera or design tool.
- Using vague file names “
image123.jpg"instead of descriptive, keyword-friendly names. - Leaving out alt text, which hurts SEO and accessibility.
- Failing to resize images for the intended screen or container size.
- Neglecting lazy loading, which delays performance on longer pages.
- Ignoring responsive image techniques leads to slow mobile load times.
Avoiding these mistakes is as important as applying the right strategies.
Final Thoughts: Putting It All Together
Image optimization is no longer optional; it’s essential for any website that wants to rank well, load fast, and deliver a great user experience.
By following the practices outlined in this guide, you’ll ensure your website images:
- Load quickly without sacrificing quality
- Help, rather than hurt, your SEO
- Adapt to every screen size
- Contribute to lower bounce rates and longer time-on-site
Start small: pick a few images on your site and run them through tools like TinyPNG or Squoosh. Use PageSpeed Insights to measure the improvements. From there, integrate image optimization into your content workflow permanently.
Related Reading:
Bonus: Quick Optimization Checklist
Here’s a fast checklist to follow every time you upload an image:
- Choose the right format (JPEG, PNG, WebP, AVIF)
- Resize to the maximum needed display size
- Compress using TinyPNG, Squoosh, etc.
- Rename with descriptive keywords
- Add clear, relevant alt text
- Use lazy loading (
loading="lazy") - Test page speed after upload