Here’s What We’ve Covered
- What are free blogs and their examples
- Limitations of free blogs
- Advantages of self-hosted standard blogs over free blogs
- How to start a free blog that makes money
- How to write your first blog post
- How you can monetize your blog and make money
What is a free blog?
A free blogging platform lets you publish content at no cost on platforms like Blogger or Medium. It’s great for beginners to try blogging before committing, but comes with limits—you don’t fully own your content, you can’t monetize it, and your URL includes the name of the platform (like yourblog.blogspot.com). For real growth, most bloggers eventually upgrade to self-hosted sites.
key characteristics of free blogs:
- Cost-effective: You don’t need to pay for web hosting or a domain name (the web address) initially.
- Easy to use: Free platforms often have user-friendly interfaces that make creating and managing your blog content simple, even for beginners with no technical knowledge.
- Limited features: Free platforms might have restrictions on customization, design options, storage space, and monetization methods compared to paid options.
- Branding limitations: Your blog’s URL will typically include the free platform’s branding (e.g., yourblog.blogspot.com). You can’t have a completely custom domain name.
Limitations of free blogs
These are common features among blogs created for free using these blogging platforms;
- You will remain under their domain name something like, “medium.com/yourblogname”
- You can’t monetize your post with ads.
- Your content will hardly appear in Google, meaning that you will constantly need to promote it to continue getting traffic.
- Some of them like Wix will contain Wix ads that you can’t make money from and it shows you are using the free version of Wix.
- You can’t customize them the way you want they basically contain few text editing features.
Where as with self-hosted standard blogs:
✅ Full ownership (no platform rules)
✅ Better monetization (ads, affiliates, products)
✅ Stronger SEO (ranks higher on Google)
✅ Professional branding (yourname.com)
✅ Total control (design, plugins, features)
A self-hosted blog offers you all of these features while a free blogging platform will not – self-hosted unlocks your full blogging potential.
How To Start a Blog For Free and Make Money
Step 1: Pick the Blogging Niche of Your Choice
Choosing a suitable niche requires careful consideration of both your interests & skills, search demand, profitability, and competition.
Here’s a roadmap to guide you:
1. Research your niche search demand
You want a niche that has enough search demand to ensure people are actively searching for content in that area. A niche with no demand means no traffic, while one with too much demand might be oversaturated.
Steps to Analyze Search Demand:
[a]. Use Keyword Research Tools: Tools like Google Keyword Planner, Ahrefs, Ubersuggest, or SEMrush can help you find the search volume for keywords in your niche.
Example: If you’re interested in a fitness blog, you can use a keyword tool to check the search volume for terms like “home workout routine” or “beginner fitness tips.”
[b]. Check Google Trends: Google Trends can show you how popular a search term is over time. A stable or rising interest in your niche is a good indicator of demand.
Example: If a “plant-based diet” is showing upward trends, it suggests increasing demand in that niche.
[c]. Long-Tail Keywords: Focus on long-tail keywords (more specific phrases) in your niche, which may have lower competition but still have significant search volume. For example, “beginner yoga for seniors” has lower competition than just “yoga.”
2. Evaluate Profitability
While you may choose a niche based on passion, you also need to assess whether it can generate income. Profitability comes from affiliate marketing, product sales, advertising, sponsored posts, and more.
Steps to Evaluate Profitability:
[a]. Monetization Methods: Consider how you can monetize the niche:
- Affiliate Marketing: Can you promote products or services in your niche? For example, if you’re into tech gadgets, you can join affiliate programs from Amazon or specific tech brands.
- Ad Revenue: How easily can you generate traffic to get advertisers on your blog (via display ads like Google AdSense)?
- Digital Products: Can you sell e-books, courses, or printables?
- Sponsored Content: Are brands in your niche willing to pay for sponsored posts?
[b]. Affiliate Programs: Research whether there are good affiliate programs related to your niche. Use platforms like ShareASale, CJ Affiliate, or Amazon Associates to check for suitable products or services to promote.
Example: If your niche is fitness, you might find affiliate programs for workout equipment, online courses, or supplements.
[c]. Cost of Products/Services: Higher-ticket items or services tend to offer more substantial affiliate commissions. If you can promote higher-priced products, like business software or premium courses, the potential for profit is higher.
3. Assess Competition
While some competition is healthy (it shows there’s demand), too much competition can make it harder to stand out. On the other hand, if there’s no competition at all, it might indicate low demand.
How to evaluate your niche competition:
[a]. Google Search Results: Perform a Google search for your target keywords. Check the top-ranking pages. Are they from established websites with a lot of authority (like large media outlets)? Or do you see newer, smaller blogs in the results?
Example: Search for “best beginner yoga classes” and see how many well-established yoga brands are ranking on the first page.
[b]. Assess the Difficulty of Ranking: Use tools like Ahrefs or SEMrush to check keyword difficulty scores. If the keyword difficulty is too high, you may want to consider targeting lower-competition keywords or sub-niches.
[c]. Niche Saturation: Evaluate whether you can differentiate yourself in the niche. Can you provide a unique angle, fresh perspective, or underserved topic within the larger niche?
For example: Instead of a general parenting blog, you could focus on parenting tips for single dads.
[4]. Analyze Competitors: Look at the top blogs or websites in your niche. Are they well-established with massive followings, or is there space for new blogs? If it’s a highly competitive niche, find a sub-niche (a more specific aspect of the broader topic) to target.
If you can’t analyze through all of these factors above we have a quick highlight of the “15 Most Profitable Blogging Niches” you can choose from and get started.
Step 2: Choose A Free Blogging Platform
Here are some of the best free blogging platforms
- WordPress.org – This is the most used blogging platform it requires a $2 – $3 web hosting to use. If you completely don’t want a free platform you can use other options below.
- Blogger: Blogger offers a simple and user-friendly interface ideal for beginners.
- Medium: A social publishing platform with a focus on high-quality content. It’s a good option for writers looking to build an audience within Medium’s existing user base.
- Wix: A website builder with a strong blogging component. It offers drag-and-drop editing for easy customization.
Pick one from the options above: WordPress
In this post we are going illustrate how you can use WordPress.org to start a standard blog for free which requires a third-party web hosting provider that will charge you less than $3 to get started.
If you entirely don’t want to spend any money you can use other free blogging options I mentioned earlier on above which are limited. If you want the platform without a limitation you can continue with WordPress.org.
- Step 1: Visit HostGator
- Step 2: Select your hosting plan
- Step 3: Register your domain name
- Step 4: Set your subscription period
- Step 5: Create your HostGator account
- Step 6: Install WordPress through HostGator
- Step 7: Pick a pre-built theme
- Step 8: Customize pages and publish content
Step 1: Click On Our “HostGator” Discount Link
Using our discount link you will get HostGator for less than its original price.
HostGator is a reliable web hosting service that offers industry-standard hosting.
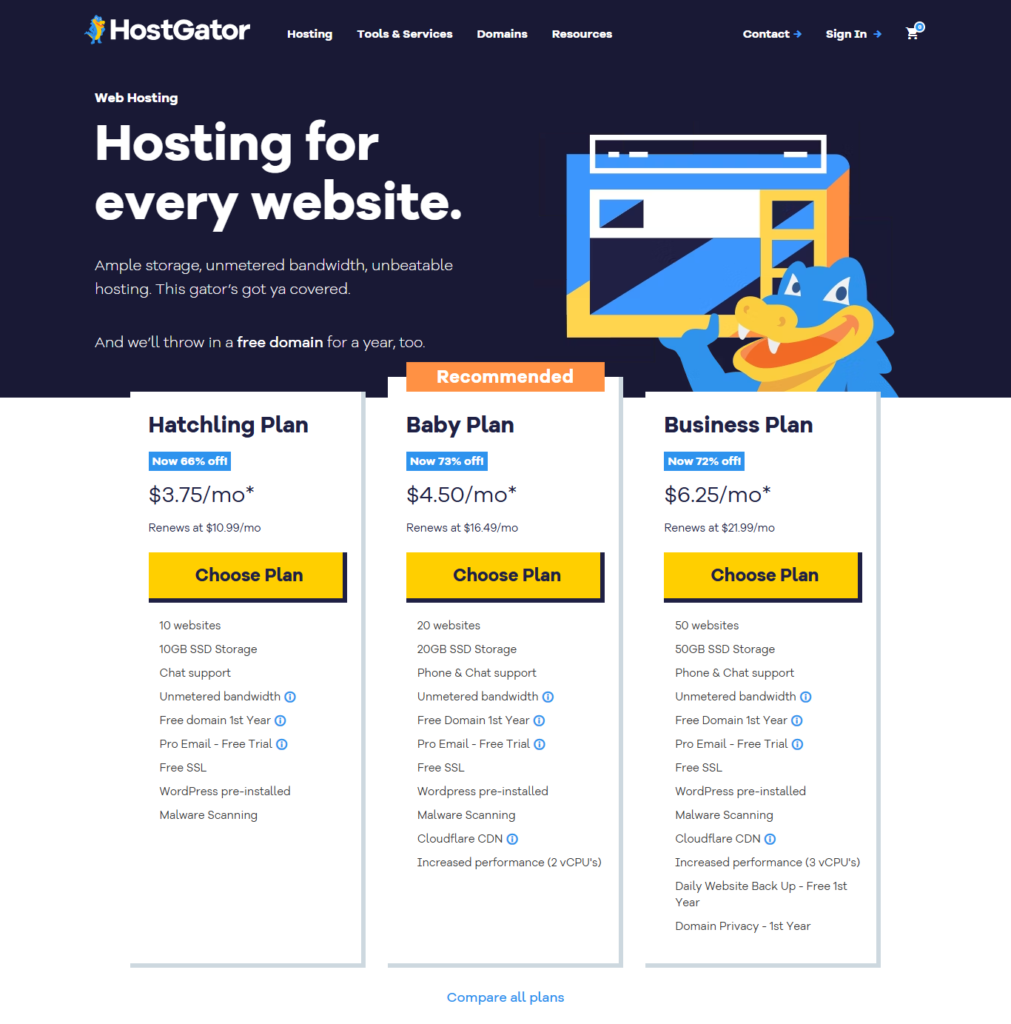
Step 2: Choose Your HostGator Plan
We recommend starting with the Hatchling Plan — it’s the most affordable option and perfect for new blogs. Since, you can always upgrade later as your site grows.
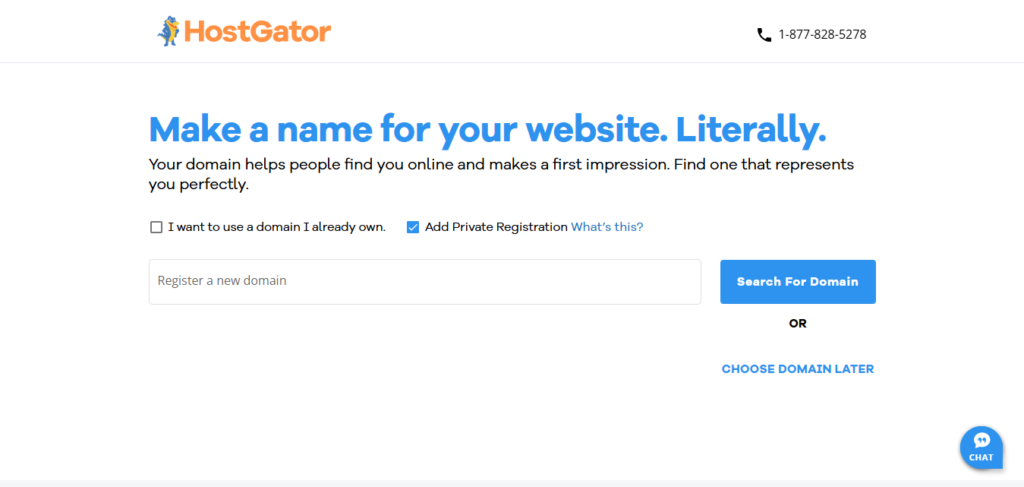
Step 3: On the Page Below Claim Any Domain Name of Your Choice
After selecting your hosting plan above, you’ll land on this page to:
1️⃣ Register your domain (e.g., yourblogname.com) with Hostgator, and
2️⃣ Complete your sign-up
How to Choose the Perfect Blog Domain Name
✅ 1. Keep It Simple & Memorable
- Easy to spell (avoid slang/complex words)
- No hyphens/numbers (e.g., “Fit4Life” → confusing)
- Pronounceable (test: say it aloud—is it clear?)
✅ 2. Reflect Your Niche
- Include keywords (e.g., “TheBudgetTraveler.com” for finance tips)
- Avoid vague names (e.g., “LifestyleWithLisa.com” → too broad)
✅ 3. Short = Strong
- Ideal length: 6–14 characters
- Compare: “BakingAdventures.com” (17 chars) vs “BakeWise.com” (8 chars)
✅ 4. Future-Proof It
- Works if you expand topics (e.g., “YogaWithGrace.com limits content)
- Check trademark conflicts (use USPTO.gov)
✅ 5. Extensions Matter
- .com is best (trusted, easy to recall)
- Avoid obscure TLDs (.blog, .space) unless branding demands it
💡 Pro Tip: Find Unique Blog Name Ideas Relevant for Different Niches
Step 4: Select Your Hosting Subscription Period
Important Selection Tip:
- Choose the Hatchling plan (shown on the right side)
- Select your subscription period:
- 1 year (recommended minimum)
- 36 months (best value if affordable)
Pick what fits your budget – you can always upgrade later!
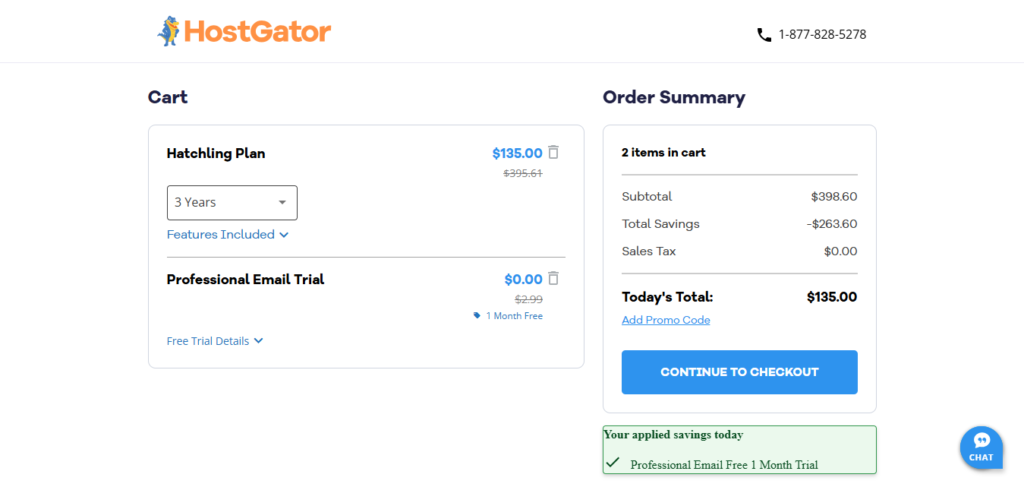
Step 5: Create Your HostGator Account
Provide your account sign up information like your name, email, password, etc to create your account.
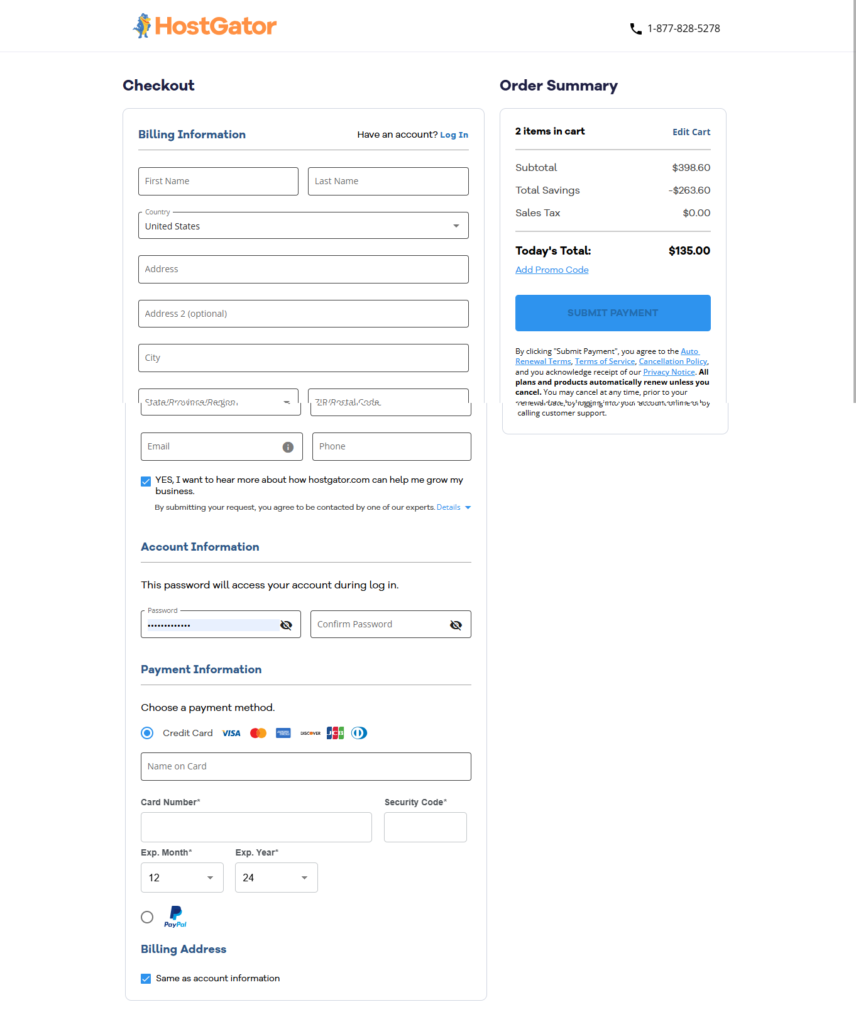
Enter the coupon code “SNAPPY” and check if there is a discount at the
moment. Discounts are not always available.
Preview your information before checkout.
Step 6: Install WordPress Within Your HostGator Account
✅ Action Required:
After completing your HostGator signup, follow these simple steps to install WordPress:
- Log in to your HostGator account
- Locate and click the “WordPress” section
- Follow the prompts to create your WordPress account
- You’ll be automatically logged into WordPress
That’s it! You’re now ready to:
- Start publishing blog posts
- Customize your site’s design
- Build your pages
Pro Tip: The installation typically takes less than 5 minutes. If you don’t immediately see the WordPress option, check under “Website” or “Software” in your HostGator dashboard.
Step 7: Pick a Theme for Your Blog
Once selected, you can customize colors, fonts, and layout to make it truly your own. Themes are pre-designed website templates that control how your blog looks and feels.
Browse available themes, preview how they look, and choose one that fits your style or niche.
Here’s a simplified way to choose a suitable WordPress blogging theme after you’ve logged into your WordPress admin area;
- Navigate to Themes: On the left-hand sidebar of your WordPress admin dashboard, hover over “Appearance” and click on “Themes.”
- Explore the Theme Library: This is where you’ll find a vast collection of free and paid themes. You can use the search bar at the top to find themes by keyword (browse by popular features, e.g., “grid layout,” “responsive”).
- Filter Your Options: You can use the filters on the left side of the page to narrow down your search. Here are some key filters for your blog:
- Features: Look for themes with features like post formats (galleries, videos), image sliders, social media integration, and customization options.
- Layout: You can consider layouts with a clean and modern aesthetic, grid layouts ideal for showcasing outfits, and responsive design to ensure your blog looks modern and good on all devices.
- Preview Before You Commit: Once you find a theme that interests you, hover over it and click “Preview.” This will allow you to see a live demo of the theme’s layout and features.
- Read Reviews and Ratings: Check out the reviews and ratings left by other users. This can give you valuable insights into the theme’s ease of use, customization options, customer support, and downsides.
- Mobile-Friendly is a Must: In today’s world, ensure the theme you select is responsive and displays well on mobile devices. Lots of visitors coming to your blog will be coming from mobile devices so ensure that your theme is mobile-friendly by using the preview function to check how it looks on mobile and other screens. This is very advisable.
- Consider Paid Themes: If you don’t find what you like with free themes you can use premium or paid themes with better or more attractive appearance and features. This is entirely optional and often not advisable for complete beginners who still don’t fully understand WordPress well enough.
Step 8: Customize Your Blog’s Core Pages and Start Publishing
- Dive into your theme’s settings to play with colors, fonts, and layouts. This is where your brand’s personality shines!
- Pro tip: Most themes include ready-made templates for key pages (About, Contact, Home). Tweak them to save time—no design degree needed.
- You can start publishing your first post to edit and see how it looks.
🎉 Congrats! You’ve officially launched a fully functional blog — you’re now ready to share your content with the world and start monetizing your efforts!
How To Write Your First Blog Post
- Go to Posts > Add New: In your WordPress dashboard, go to the “Posts” section and click “Add New.”
- Create a Title and Content: Write your first blog post by adding a title and creating the content.
- Publish: When you’re ready, click “Publish” to make your first post live!
Here is “How To Write A Blog Post Step-by-Step“
How to Monetize Your Blog and Make Money
While monetization options are limited on free blogging platforms, Here are the two most popular ways to monetize your blog and start makign money.
[1]. Display Ads
There are various ad networks you can join. Some of the most popular ones include:
- Google AdSense: Great for beginners. It’s easy to apply, and they place relevant ads on your site on the content displayed on a page.
- Mediavine: For bloggers with 50,000 sessions/page views per month. Known for high payouts.
- AdThrive: Requires at least 100,000 monthly page views, offering premium ad rates.
- Ezoic: Accepts lower-traffic blogs and offers decent ad placements.
Tip: Start with Google AdSense if your traffic, when your traffic grows you can then apply to premium networks like Mediavine or AdThrive with higher payouts.
[2]. Affiliate Marketing
Sign up for affiliate programs that align with your blog’s niche.
Here are some popular choices:
- Amazon Associates Program: Ideal for almost any niche that talks about physical-related products. Amazon offers a wide range of physical products in many niches or industries.
- ShareASale: A marketplace offering many affiliate products across various industries both physical and software-related products.
- CJ Affiliate: Another broad network for different affiliate products and services.
- Impact: Focuses on more prominent brands and high-quality affiliate products, mainly software products and some physical products.
All of these above are affiliate networks where you can join multiple affiliates offers to promote and manage them in the same platform.
- Niche-specific programs: You can also find single-in-house affiliate products. Look for affiliate programs directly related to your niche, such as web hosting companies for tech bloggers or beauty brands for fashion bloggers, etc.
Tip: Only promote products that are relevant and valuable to your audience to build trust and increase conversion rate due to product relevance to them.
As you grow your blog traffic you may need to diversify to other methods of monetization. Like the ones mentioned here, “7 Main Ways To Monetize Your Blog And Make Money“.
Post End.
The Fastest Way to Start Making $10,000/month as a New Blogger
1. Get Started with HostGator – Your Blog’s Best Friend
The first step to making money blogging is having a solid foundation. HostGator offers affordable, reliable hosting, a free domain, and easy access to WordPress — the best platform for new bloggers. Sign up today and get your blog online in minutes.
👉 Get Started with HostGator Now!
2. Choose a Profitable Niche
Pick a profitable niche you’re interested in and ready to dive into. Focus on one niche, and be prepared to create content that solves your audience’s problems. You can still choose your niche after your blog is live online.
3. Create High-Impact Content
Start by making lists of your niche “money posts” [Posts good for affiliates or with high traffic volume suitable for ads]. These “money posts” are your primary focus. Then, also create supporting posts to build traffic and rank better in Google. The more content you create, the faster you’ll grow your audience.
4. Success Rules to Follow:
- Focus on Your Niche: Stick to one niche and become an expert in it.
- Quality Content Only: Focus on delivering value with every post.
- Have a Plan: Set clear goals for content creation and promotion [Like how many posts you intend to create and your plan on promoting them to help you grow your initial traffic].
HostGator has everything you need to get started quickly, with a platform that grows as you do. Ready to start making money with your blog?
👉 Launch Your Blog with HostGator Today
Doing these things will increase your chances of making more than $10,000/month consistently after 6 months to one year.